Content Delivery Networks
Azure offers a CDN which is simple to deploy. It does have a lot of premium features, and those can be complex. In this article we will unpack a standard setup to enable our static storage website using a google registered domain.
Create an Azure account
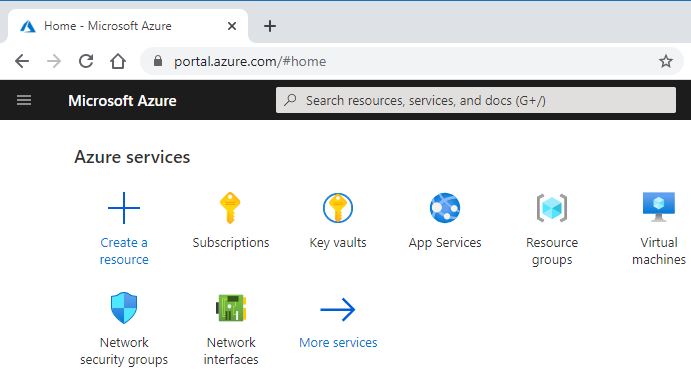
- Using a web browser, navigate to the Azure Portal at http://portal.azure.com.
- If you have an account, sign in. If you don't have an account, Click "Create one!". The follow the sign up process.
Create a CDN Profile
- Using a web browser, navigate to the Azure Portal and sign in, if you aren't currently signed in.
- From the Azure portal, select the Search resources, services, and docs text window and type "cdn".
- From the search results find "CDN profiles" and select it.
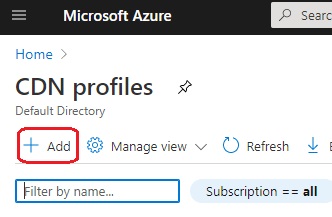
- From "CDN Profiles" select "Add".
- Fill out the "CDN Profile" form.
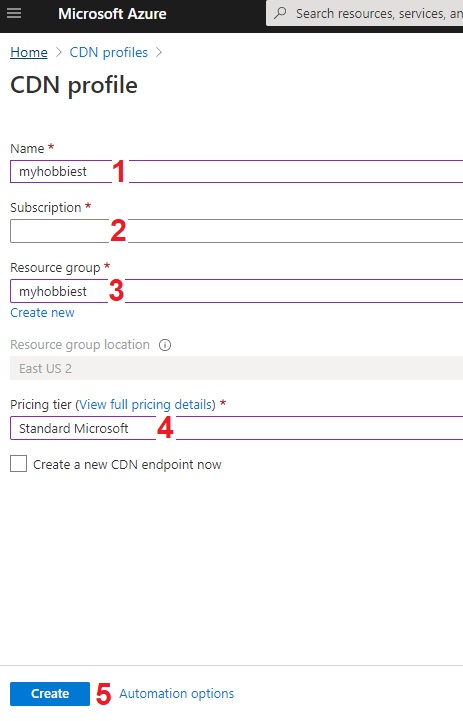
- Define a CDN profile name.
- Pick your subscription, the defualt is likely correct.
- Name a Resource group (folder) that all of your resources will go inside.
- Pick a pricing tier. "Standard Microsoft" is what we will need for this exercise.
- Select "Create".
- Once submitted with the "Create" button, the deployment will begin. When the deployment finishes, click "Refresh".
- Click on the new profile, when it appears in the CDN Profile listing.
Create a CDN Endpoint
- From the CDN profile, select "Endpoint"
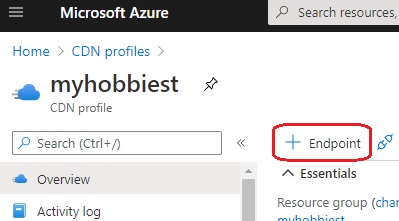
- Fill out the "Add an endpoint"
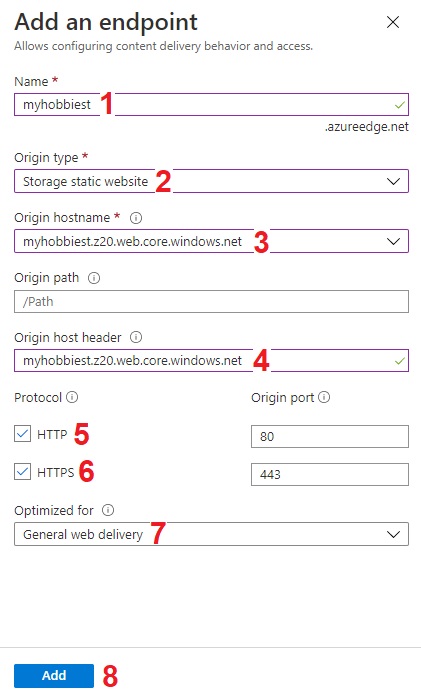
- Pick a host name for the azureedge.net domain. It has to be unique, but it doesnt have to be pretty.
- Select Storage static website as the origin type.
- Select the primary endpoint from your storage account that is hosting the static website as the origin hostname.
- Verify the Origin host header matches the Origin hostname.
- Ensure HTTP is enabled.
- Ensure HTTPS is enabled.
- Set the web optimzation to General web delivery.
- Select "Add".
Conclusion
Now you have a CDN frontend for your website, hosted in Azure, but there's still configuration to be done. I'll cover those tasks in detail in a future post.


