Pennies a Month and a Dollar a year
Azure has a few offerings which are usage metered. Those offerings can be used to host a website very, very cheaply. In this post, I'll explain how to get a website up and running in Azure.
Create an Azure account
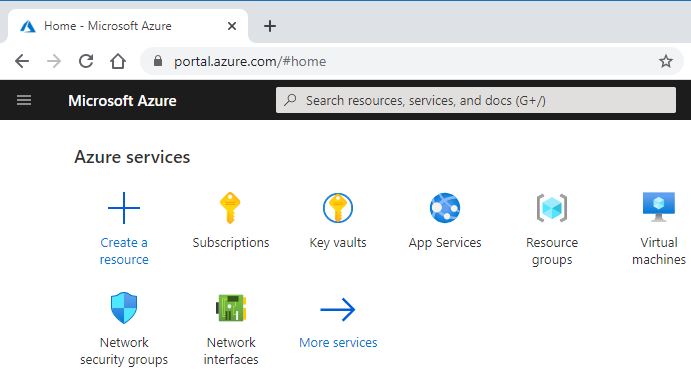
- Using a web browser, navigate to the Azure Portal at http://portal.azure.com.
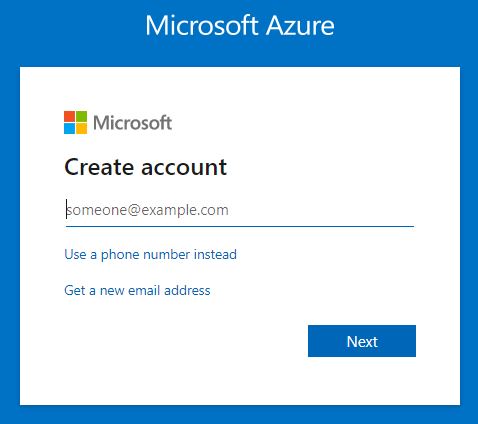
- If you have an account, sign in. If you don't have an account, Click "Create one!". The follow the sign up process.
Create a Storage account
- Using a web browser, navigate to the Azure Portal and sign in, if you aren't currently signed in.
- From the Azure portal, select the Search resources, services, and docs text window and type "storage".
- From the search results find "Storage Accounts" and select it.
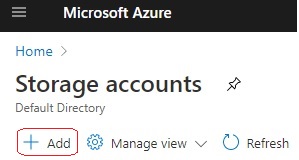
- From "Storage Accounts" select "Add".
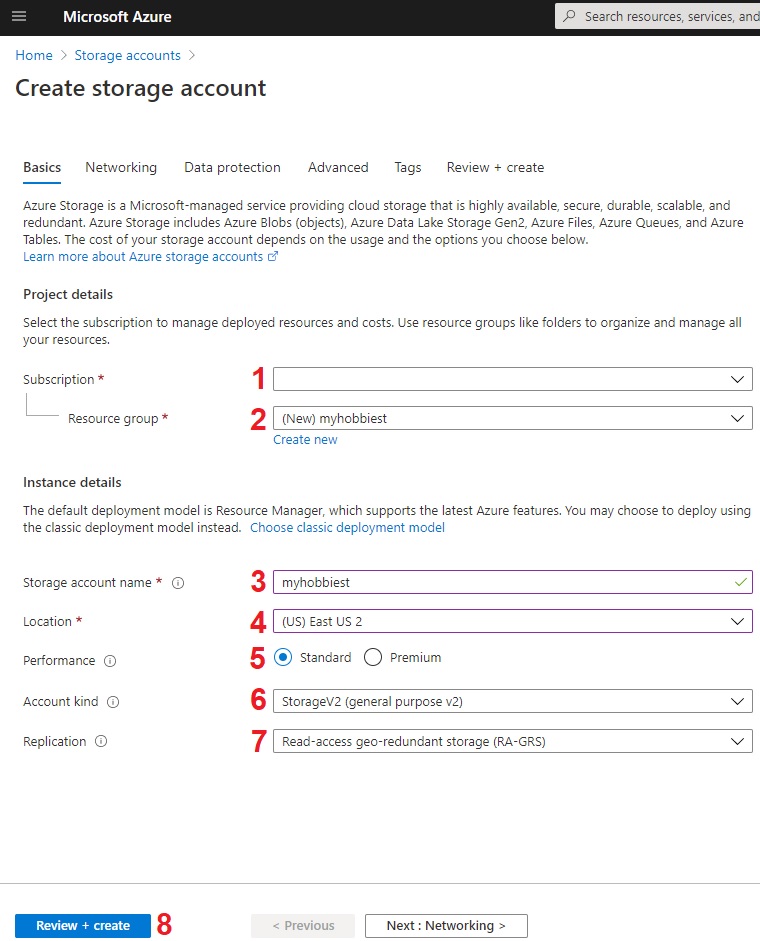
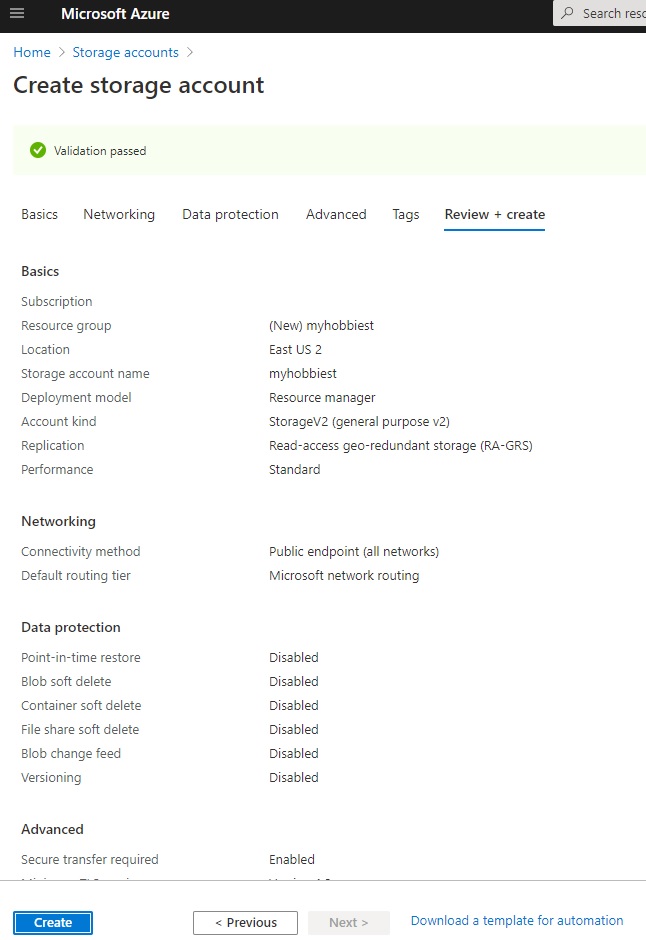
- Fill out the "Create Storage Account" form.
- Pick your subscription, the defualt is likely correct.
- Name a Resource group (folder) that all of your resources will go inside.
- Pick a fairly unique name in all lower-case for your storage account.
- Pick a regional data center for your resources. (East Us 2 is fairly inexpensive)
- Pick standard performance. Premium isn't usable for this workload. (yet)
- Pick StorageV2.
- Pick LRS to maximize savings or RA-GRS to be highly available.
- Select "Review + Create".
- Review the summary screen before clicking "Create". Go back and change anything that doesn't look correct.
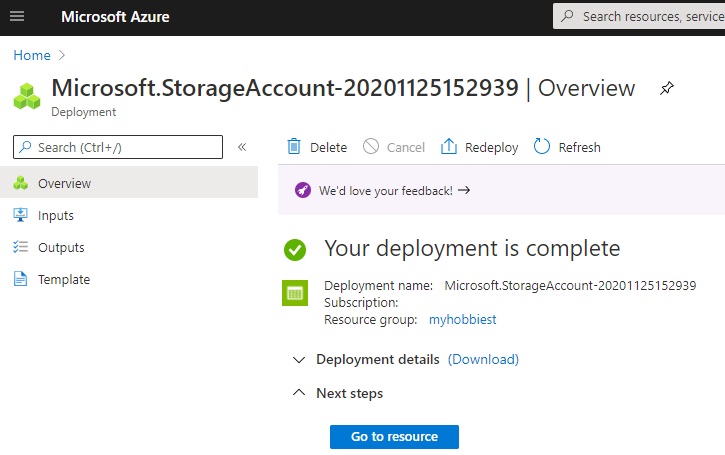
- Once submitted with the "Create" button, the deployment will begin, and your browser will be redirected to the deployment overview. Select "Go to resource" when the deployment finishes.
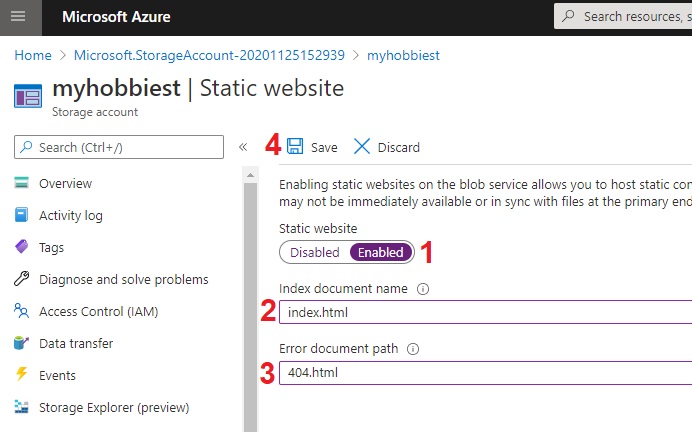
- From the Storage account menu select "Static website"
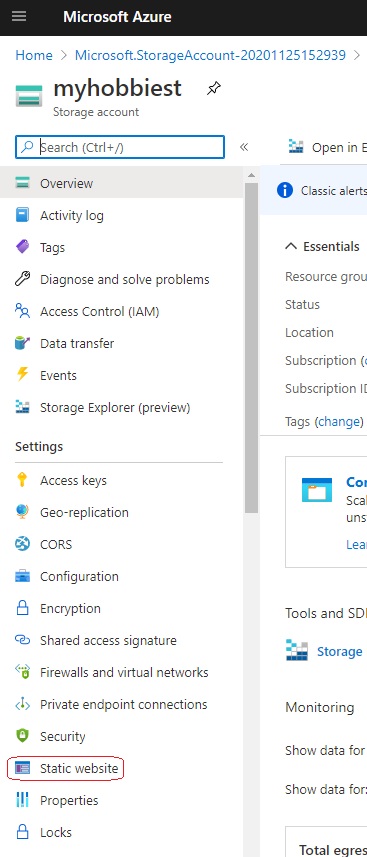
- Configure the static website option for your storage account.
- Select "Enabled"
- Input
index.html - Input
404.html - Select "Save"
- Make note of the "Primary Endpoint" (and "Secondary Endpoint," if you chose RA-GRS earlier)
Upload content to your website
- Obtain the latest
azcopyfrom https://docs.microsoft.com/en-us/azure/storage/common/storage-use-azcopy-v10 - Unpack the achive and store the azcopy binary in
C:\Hugo\bin\or a place appropriate to you.Optional: Add the Azcopy Folder to the Windows Path Variable
This configuration change is handy for commonly used commands. With this change in place you can run
azcopyrather thanC:\Hugo\bin\azcopy.exe.- Click the Search Windows icon.
- Type "This PC"
- Right click on This PC from the search results and select Properties.
- Select Advanced System Properties from the left menu.
- Select Environment Variables... from just above the cancel button.
- Select the Path User variable from the top panel, and click Edit....
- Select New and type your path
C:\Hugo\binin the text area. - Select OK and exit out of the settings windows.
- Start a new command prompt with
cmdto see the change.
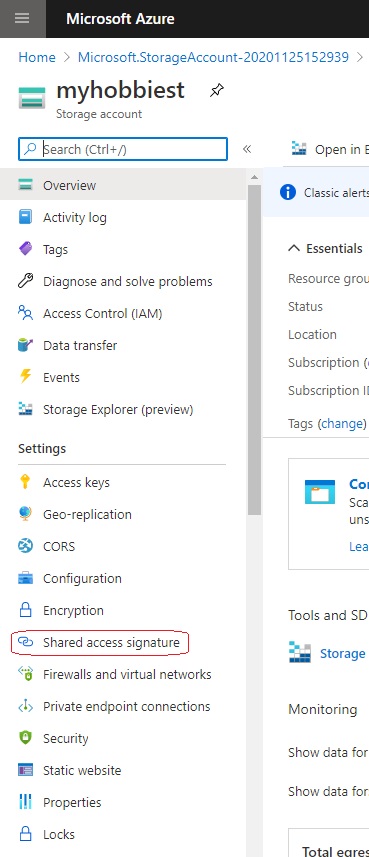
- Using the web browser, navigate to your "Storage account" in the Azure portal.
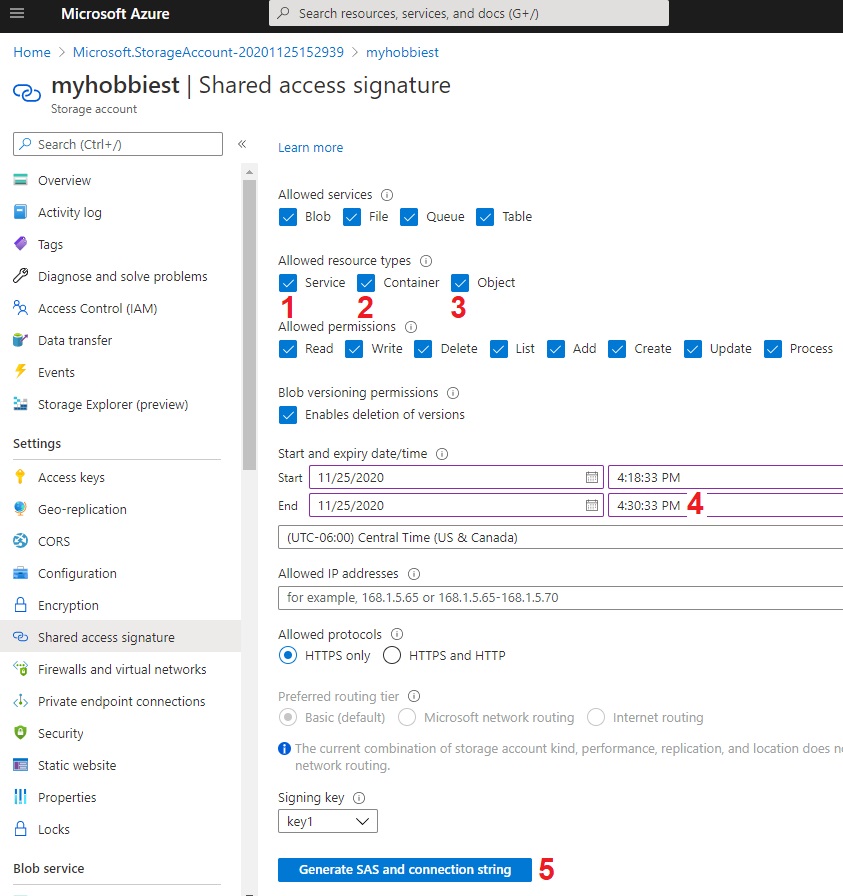
- Select "Shared Access Signature."
- Define your shared access signature request.
- Allow "Service"
- Allow "Container"
- Allow "Object"
- Change the time to a shorter duration.
- Select "Generate SAS and connection string"
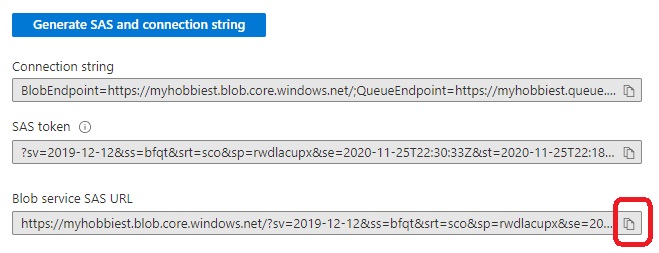
- Scroll down and copy the Bolb service SAS URL
- Open a DOS window or an appropriate command prompt for your given OS.
- Navigate to your website development directory, in our case
C:\Hugo\hobbiest - Verify the hugo project with
dirC:\Hugo\myhobbiest>dir Volume in drive C is Windows Volume Serial Number is 1B5C-ABCD Directory of C:\Hugo\myhobbiest 11/24/2020 09:22 AM <DIR> . 11/24/2020 09:22 AM <DIR> .. 11/24/2020 09:01 AM <DIR> archetypes 11/24/2020 09:24 AM 3,215 config.toml 11/24/2020 09:01 AM <DIR> content 11/24/2020 09:01 AM <DIR> data 11/24/2020 09:01 AM <DIR> layouts 11/24/2020 09:22 AM <DIR> resources 11/24/2020 09:01 AM <DIR> static 11/24/2020 09:10 AM <DIR> themes 1 File(s) 3,215 bytes 9 Dir(s) 21,934,317,568 bytes free - Generate the website using
hugoC:\Hugo\myhobbiest>hugo Building sites … WARNING: calling IsSet with unsupported type "invalid" (<nil>) will always return false. | EN -------------------+----- Pages | 6 Paginator pages | 0 Non-page files | 0 Static files | 0 Processed images | 0 Aliases | 0 Sitemaps | 1 Cleaned | 0 Total in 68 ms - Verify the hugo project with
dir. There should now be a .\public directory.C:\Hugo\myhobbiest>dir Volume in drive C is Windows Volume Serial Number is 1B5C-ABCD Directory of C:\Hugo\myhobbiest 11/24/2020 09:22 AM <DIR> . 11/25/2020 04:29 PM <DIR> .. 11/24/2020 09:01 AM <DIR> archetypes 11/24/2020 09:24 AM 3,215 config.toml 11/24/2020 09:01 AM <DIR> content 11/24/2020 09:01 AM <DIR> data 11/24/2020 09:01 AM <DIR> layouts 08/30/1754 04:43 PM <DIR> public 11/24/2020 09:22 AM <DIR> resources 11/24/2020 09:01 AM <DIR> static 11/24/2020 09:10 AM <DIR> themes 1 File(s) 3,215 bytes 9 Dir(s) 21,934,317,568 bytes free - Upload the website using
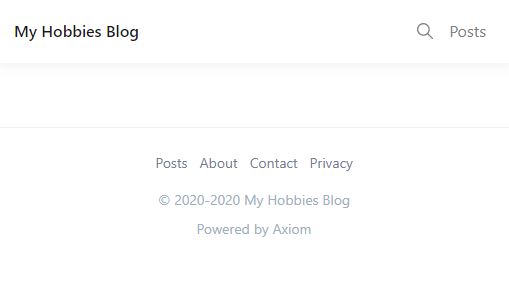
azcopy cp .\public\* "https://myhobbiest.blob.core.windows.net/$web{{SAS token}}"C:\Hugo\hobbiest> azcopy cp .\public\* "https://myhobbiest.blob.core.windows.net/$web?sv=2019-12-12&ss=bfqt&srt=sco&sp=rwdlacupx&se=2020-11-25T22:30:33Z&st=2020-11-25T22:18:33Z&spr=https&sig=%2FqTyJM3Pi%2GHMrk4jAwaQo%2F1ihPgmfKGCjAQJdCrzua8%3D" INFO: Scanning... INFO: Any empty folders will not be processed, because source and/or destination doesn't have full folder support Job 888c9685-e3bd-994f-70e6-38e86525143e has started Log file is located at: C:\Users\millsjt\.azcopy\888c9685-e3bd-994f-70e6-38e86525143e.log INFO: azcopy: A newer version 10.6.0 is available to download 0.0 %, 0 Done, 0 Failed, 9 Pending, 0 Skipped, 9 Total, Job 888c9685-e3bd-994f-70e6-38e86525143e summary Elapsed Time (Minutes): 0.0334 Number of File Transfers: 9 Number of Folder Property Transfers: 0 Total Number of Transfers: 9 Number of Transfers Completed: 9 Number of Transfers Failed: 0 Number of Transfers Skipped: 0 TotalBytesTransferred: 66180 Final Job Status: Completed - Referring back to the "Primary Endpoint" in the Static website configuration, there is now a website.
Conclusion
Now you have a website, hosted in Azure, but there's still a lot of configuration to do before it's a polished site. I'll cover those tasks in detail in a future post.


