

The are many images in Azure available for generic consumption. Red Hat offers several images for BIOS and UEFI, with different minor versions. They offer some with cloud-init. Some images have RHCS and others support SAP Netweaver or HANA versions. This article will help explain the common configurations which will allow for generation of a custom image for Microsoft Azure.
Assumptions
We will need a kickstart server from which to provision. I have produced several kickstart guides for this blog under the Kickstart Tag. The guide for creating a kickstart provisioning server is covered in Provision a Kickstart Server with RHEL8 - Part 1 and Part2.
Kickstart
As a starting point, we will use a simple RHEL8.3 Beta LVM based image with a BIOS /boot. RHEL8.3 isn't available as a marketplace image for Azure, at the time of the writing of this atricle.
Kickstart Sample:
clearpart --all
zerombr
part /boot --fstype=xfs     --size=1024 --asprimary --ondisk sda
part pv.1  --fstype="lvmpv" --size=1    --grow      --ondisk=sda
volgroup rootvg --pesize=4096 pv.1
logvol /              --fstype=xfs --size=8192 --name=rootlv   --vgname=rootvg
logvol /home          --fstype=xfs --size=1024 --name=homelv   --vgname=rootvg
logvol /tmp           --fstype=xfs --size=1024 --name=tmplv    --vgname=rootvg
logvol /var           --fstype=xfs --size=1024 --name=varlv    --vgname=rootvg
logvol /var/tmp       --fstype=xfs --size=1024 --name=vtmplv   --vgname=rootvg
logvol /var/log       --fstype=xfs --size=1024 --name=vloglv   --vgname=rootvg
logvol /var/log/audit --fstype=xfs --size=1024 --name=vauditlv --vgname=rootvg

install
url --url=http://192.168.0.37/x86_64/8/3/BaseOS
repo --name="AppStream" --baseurl=http://192.168.0.37/x86_64/8/3/AppStream

network --onboot yes --bootproto=dhcp --hostname=localhost.localdomain --activate

keyboard --vckeymap=us --xlayouts='us'
lang en_US.UTF-8
rootpw "Insecure"
firstboot --enable
skipx
services --enabled="chronyd" --disabled="waagent"
timezone America/Chicago --isUtc

%pre
dd if=/dev/zero of=/dev/sda count=1000 bs=1M
%end

%packages
@base
@system-tools
WALinuxAgent
%end

%addon org_fedora_oscap
    content-type = scap-security-guide
    profile = xccdf_org.ssgproject.content_profile_pci-dss
%end

%addon com_redhat_kdump --enable --reserve-mb='auto'
%end

%post
rpm --import http://192.168.0.37/x86_64/8/3/RPM-GPG-KEY-redhat-beta
echo "[BaseOS]" > /etc/yum.repos.d/local.repo
echo "name=baseos" >> /etc/yum.repos.d/local.repo
echo "baseurl=http://192.168.0.37/x86_64/8/3/BaseOS" >> /etc/yum.repos.d/local.repo
echo "enabled=1" >> /etc/yum.repos.d/local.repo
echo "gpgcheck=1" >> /etc/yum.repos.d/local.repo
echo "gpgkey=file:///etc/pki/rpm-gpg/RPM-GPG-KEY-redhat-beta" >> /etc/yum.repos.d/local.repo
echo "[AppStream]" >> /etc/yum.repos.d/local.repo
echo "name=appstream" >> /etc/yum.repos.d/local.repo
echo "baseurl=http://192.168.0.37/x86_64/8/3/AppStream" >> /etc/yum.repos.d/local.repo
echo "enabled=1" >> /etc/yum.repos.d/local.repo
echo "gpgcheck=1" >> /etc/yum.repos.d/local.repo
echo "gpgkey=file:///etc/pki/rpm-gpg/RPM-GPG-KEY-redhat-beta" >> /etc/yum.repos.d/local.repo
%end
reboot --eject
Virtual Machine Guest
In this example, I'm going to use Hyper-V to host the guest, as we need the disk in Fixed Size VHD format to use in Azure. KVM or VMware can be used as well. (VMware Drive Conversion Guide / KVM Drive Conversion Guide)
| Option | Value |
|---|---|
| bios | bios |
| vcpu | 1 |
| vmem | 1024MB |
| network | internet capable |
| storage | 16GB |
| disk | VHD |
| cdrom | RHEL8 Beta Binary DVD or RHEL8 Beta Boot DVD |
Build the VM from the kickstart
- Boot the VM from the Beta DVD.
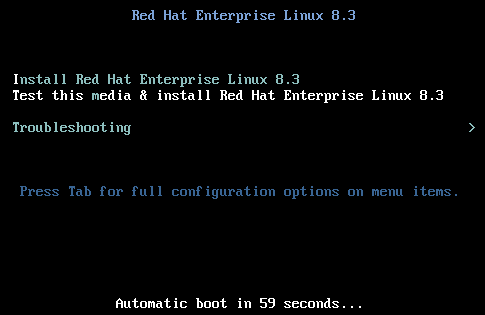
- Enter the boot command prompt by selecting the ESC key.
- DHCP IP, substitute the IP address of the Kickstart web server.
boot: linux ks=http://{$kickstart ip address}/azure8 - Static IP, substitute the IP address of the Kickstart web server.
boot: linux ks=http://{$kickstart ip address}/azure8 \
ip=ip::gateway:netmask:hostname:interface:none
For example:
ip=192.168.0.38::192.168.0.1:255.255.255.0:localhost:eth0:none
- DHCP IP, substitute the IP address of the Kickstart web server.
- The VM should boot and give you a login prompt.
Red Hat Enterprise Linux Beta 8.3 (Ootpa)
Kernel 4.18.0-221.el8.x86_64 on an x86_64

Activate the web console with: systemctl enable --now cockpit.socket

rhel8 login:
Generalize the VM to support Azure
- Log in the the VM as
root. - Edit
/etc/sysconfig/network-scripts/ifcfg-eth0to contain only:TYPE=Ethernet BOOTPROTO=dhcp DEFROUTE=yes DEVICE=eth0 ONBOOT=yes - Edit
/etc/default/grubto contain only:GRUB_TIMEOUT=1 GRUB_DISTRIBUTOR="$(sed 's, release .*$,,g' /etc/system-release)" GRUB_DEFAULT=0 GRUB_DISABLE_SUBMENU=true GRUB_TERMINAL_OUTPUT="console" GRUB_CMDLINE_LINUX="crashkernel=auto console=tty1 console=ttyS0 earlyprintk=ttyS0 rootdelay=300" GRUB_DISABLE_RECOVERY="true" GRUB_ENABLE_BLSCFG=true - Recreate the grub configuration, as
root, with the new settings.grub2-mkconfig -o /boot/grub2/grub.cfg - Edit
/etc/waagent.confto change the following lines...- From:
ResourceDisk.EnableSwap=n ResourceDisk.SwapSizeMB=0 - To:
ResourceDisk.EnableSwap=y
ResourceDisk.SwapSizeMB=2048
- From:
- Edit
/etc/sysconfig/networkto change the following lines...- From:
# Created by anaconda - To:
NETWORKING=yes
- From:
- Verify key services are enabled. Run the following commands as
root.systemctl enable NetworkManager.service systemctl enable waagent.service - Clean up subscription services, if necessary. In this case, we used the DVD on an external webserver.
rm -f /etc/yum.repos.d/local.repo dnf clean all - Add a secondary account to ensure non-root access.
useradd myuser echo "myuser:MyUserPassword12345" | chpasswd usermod -a -G wheel myuser - Generalize the VM with the
waagent.waagent -force -deprovision - Clear the
rootcommand history.export HISTSIZE=0 - Shutdown the VM.
init 0
Upload the Generalized VHD to Azure
Azure supports Fixed Size VHD's. If your disk is a different type, it can be converted using several tools. Use the one most suited to the source drive format.
Install Az
- Az Linux Method -- Install the Azure-cli on the kickstart host.
- Add a new repo:
# echo -e "[azure-cli] \ name=Azure CLI \ baseurl=https://packages.microsoft.com/yumrepos/azure-cli \ enabled=1 \ gpgcheck=1 \ gpgkey=https://packages.microsoft.com/keys/microsoft.asc" > /etc/yum.repos.d/azure-cli.repo' - Import the repo key.
# rpm --import https://packages.microsoft.com/keys/microsoft.asc - Install azure-cli.
# dnf install azure-cli - Login to az by running the following:
# az login - Navigate to https://microsoft.com/devicelogin and enter the code from the previous step.
- Add a new repo:
- Az Windows Method -- Install the Azure-cli on the Hyper-V host.
- Download the azure-cli-#.#.#.msi
- Run the azure-cli-#.#.#.msi.
- Complete the installation wizard.
- Open a Powershell window and type:
PS> az login
Use Az to upload the VHD to Azure
- Log in and make a new storage account target for the VHD.
- If you have more than one subscription, pick one by running the following command:
PS> az account set --subscription "Subscription Name" - Create a resource folder.
PS> az group create --name Images --location="East US" - Create a storage account for blob storage.
PS>  az storage account create --name {Your account name} \
--resource-group Images --location "East US" \
--sku Standard_LRS --encryption-services blob
- If you have more than one subscription, pick one by running the following command:
- Create a new application user to do storage operations.
- Create an application account for storage operations.
PS> az ad sp create-for-rbac --name "image uploader" - Take the
Appidresult from the previous command and use it to assign the storage role to the account.PS> az role assignment create --assignee {Your AppID} \ --role "Storage Blob Data Contributor" \ --resource-group "images" - Login with your application account using the output from the previous
az ad sp create-for-rbaccommand.PS> az login --service-principal -u {Your AppID} \ -p {Your AppID password} --tenant {Your tenant}
- Create an application account for storage operations.
- Make a new folder on the storage account and upload the VHD in to the folder.
- Create a container in the new storage account.
PS> az storage container create --account-name {Your account name} \ --name images --auth-mode login - Upload your VHD.
PS> az storage blob upload --account-name {Your account name} \
--container-name images --file "D:\128G.vhd" --name RHEL83.vhd
- Create a container in the new storage account.
Create an Azure VM from the Uploaded VHD
- Open the Portal in a web browser and authenticate.
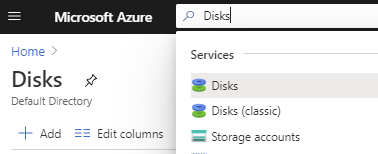
- From the search bar, type "Disks". Select "Disks" from the dropdown.
- From the "Disks" panel, click the "+ Add" button.
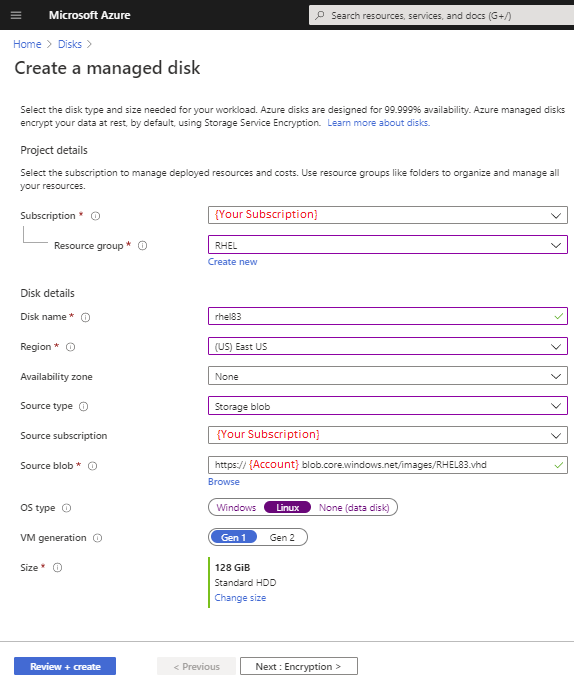
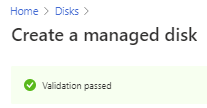
- Complete the "Create a managed disk" panel, and select "Review + create" in the bottom left.
- You should see "Validation passed." If so, select "Create."
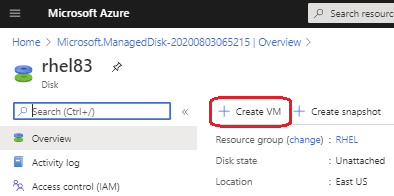
- Once the deployment is complete, select "Go to resource" or return to the "Disks" panel and select the new disk.
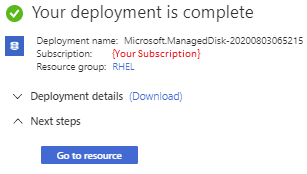
- Select "Create VM" from the "Overview" panel of the new disk.
- From the "Create a virtual machine" panel, you can see that the "Image" is already configured with the disk from the previous deployment. Complete the panels, as desired, and select "Create" to deploy the VM.
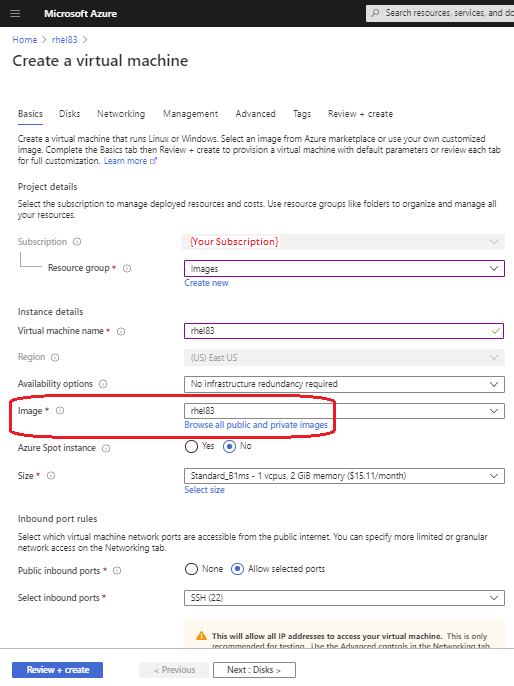
- Select "Go to resource" to open the VM panel when the deployment completes.
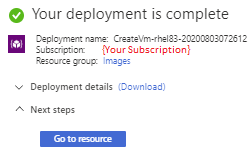
Generalize and Capture the VM to the Images Library
- From the new Virtual machine resource panel, scroll to the "Support + troubleshooting" section and select "Serial console."

- Log in with your secondary account.
- Elevate you user to root.
sudo su - - Generalize the system once again.
waagent -force -deprovision+user - Clear the
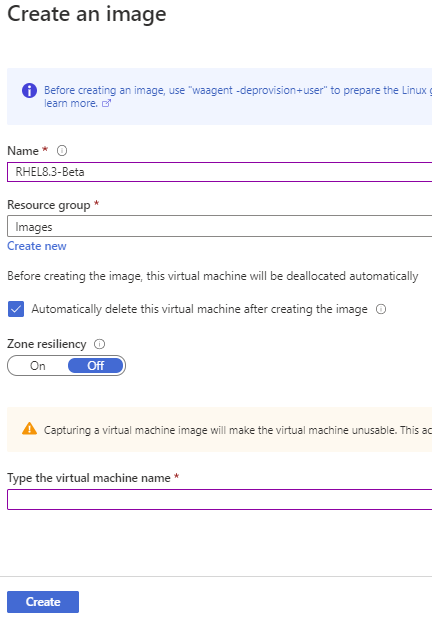
rootcommand history.export HISTSIZE=0 - Return to the VM overview panel and select the "Capture" button.

- Complete the "Create an Image" panel, optionally deleting the source VM.
Deployments
- Image overview method
- Type "images" in the search bar. Select "Images" from the dropdown.
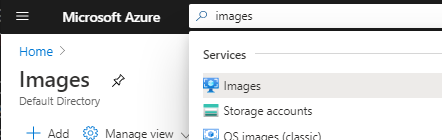
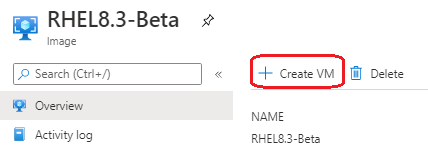
- From the "Images" panel you can now see the new "RHEL8.3-Beta" image. Select the image, and you will be able to deploy VMs directly from the image overview.
- Type "images" in the search bar. Select "Images" from the dropdown.
- Create VM method
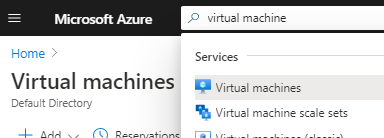
- Type "virtual machine" in the search bar. Select "Virtual Machines" from the dropdown.
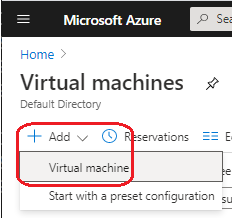
- Select "Add" and then "Virtual Machine" when the dropdown opens.
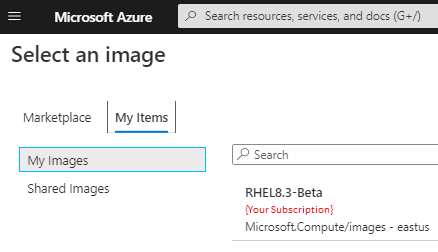
- From the "Create a virtual machine" panel, select "Browse all public and private images" under "Image."
- Select "My Items" instead of the default focus, "Marketplace."
- Type "virtual machine" in the search bar. Select "Virtual Machines" from the dropdown.
Conclusion
After finishing this exercise, we have an image which can build VMs in moments with little technical knowledge and effort. It has a custom partitioning and security profile, which is something hard to come by in the Marketplace.